How to Make a Rotating Digital Calendar for Your Desk or Wall
Want a unique way to organize your days? A rotating digital calendar can bring a fresh, interactive experience to your workspace. Let’s dive into how you can build one!
Creating a rotating digital calendar is easier than you think. You’ll need a few essential components like a screen, software, and a rotating stand. With these, you can craft a functional and modern calendar.

Whether you’re tired of traditional paper calendars or looking for something more high-tech, building your own rotating digital calendar can be a fun project. You’ll not only enhance your productivity but also add a unique touch to your desk or wall. Let’s explore the steps to get started.
Why Choose a Rotating Digital Calendar for Your Workspace?
Tired of flipping pages? Want a digital solution that rotates automatically? A rotating digital calendar is a perfect fit. It’s both functional and stylish, but how can it benefit your work environment?
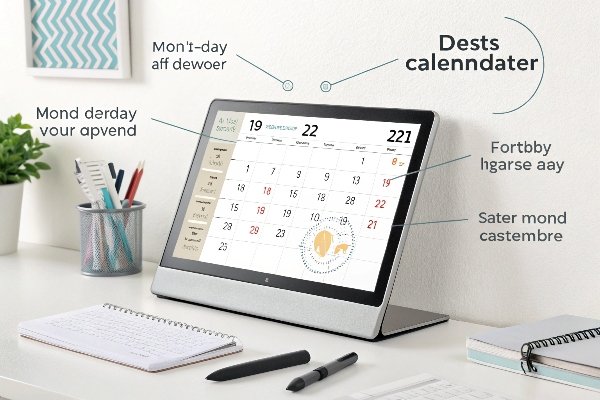
A rotating digital calendar is both practical and a great conversation piece. It allows you to see the entire month at a glance and update it easily. It’s perfect for anyone who prefers a more dynamic, tech-savvy solution for scheduling.

Benefits:
- Convenient and Space-Saving: See the whole month in one view while saving space.
- Tech-Savvy: Sync with apps or devices for automatic updates.
- Customizable: Change layout, colors, and more to suit your style.
A rotating digital calendar combines the convenience of digital technology with the hands-on interaction of rotating displays. It provides users with a constantly changing view of their schedule, eliminating the need for manual flipping or updating. By adding automation, it can rotate based on your preferred time intervals, such as hourly or daily, giving you a seamless experience. For businesses, this kind of digital calendar can serve as a functional display, allowing employees to easily track tasks, meetings, and deadlines. This makes it a useful tool in both home offices and corporate settings.
The design is customizable, with many options available for the display, like color schemes and layouts. You can even integrate it with productivity apps to sync events or reminders directly from your phone or computer. This level of connectivity ensures that you never miss a crucial meeting or deadline. Plus, when paired with a rotating mechanism, you bring an added element of interactivity and engagement to your workspace, making your calendar feel like a centerpiece rather than just a tool.
What Materials and Tools Do You Need to Make a Rotating Digital Calendar?
Building your own rotating digital calendar requires a few tools and materials. Don’t worry, it’s simple! Here’s what you need to get started:
- Digital Screen: LCD or LED screens are good choices.
- Microcontroller: An Arduino or Raspberry Pi powers the calendar.
- Rotating Mechanism: A servo motor to make the calendar spin.
- Software: You can use Python or JavaScript for the display.

These materials can easily be found at most hardware or electronics stores. The first step is to pick out the right screen. Make sure it is lightweight and easy to mount. After that, connect it to a microcontroller to power the display. The rotating mechanism can be a pre-made stand or a custom setup using a motor.
Once all the parts are in place, you’ll use simple software to program the calendar to show the current date and rotate automatically. With just a few steps, you’ll have your own working digital calendar.
How to Set Up and Program Your Rotating Digital Calendar?
Setting up your rotating digital calendar might sound complicated, but it’s much simpler than it seems. Here’s how to get everything up and running:
- Wire the Screen: Connect the screen to the microcontroller.
- Install Software: Use Python or JavaScript to program the calendar.
- Adjust the Rotation: Attach a servo motor to control how it rotates.
- Test and Mount: Make sure everything works and secure it in place.

Once you have everything wired and connected, the first step is to install the software. This will control how the calendar displays the dates and updates them automatically. You can write simple code in Python or JavaScript to display the current date and any future or past dates if needed.
The rotating mechanism can be controlled by a servo motor. You can set it to rotate daily or at whatever interval works for you. When everything is set up, make sure to mount the screen on the rotating stand and test everything to ensure smooth rotation.
Troubleshooting and Maintenance Tips
Once your rotating digital calendar is set up, regular maintenance is key to ensuring it works properly. Here are some quick tips:
Battery Life Management:
- Use rechargeable batteries for long-lasting power.
- Set the calendar to sleep mode when not in use to save energy.
- Ensure the charging system is efficient and doesn’t overcharge the battery.
Software Updates:
- Regularly check for software updates to keep everything running smoothly.
- Sync the calendar with other devices to ensure your data is always up-to-date.
Regular Cleaning and Care:
- Wipe the screen regularly with a soft microfiber cloth to keep it clean.
- Check the rotating mechanism for any dust buildup and lubricate it as needed.
- Make sure the mounting hardware stays tight and secure.

Maintaining your digital calendar ensures it lasts longer and works as expected. Battery life, software, and cleanliness are all factors to keep in mind for optimal performance.
Conclusion
Building your own rotating digital calendar is an exciting and rewarding project that can add a personal touch to your workspace. It’s a stylish, functional, and interactive way to manage your schedule.
For more information on digital solutions that can enhance your workspace, visit www.techfamilysolution.com or reach out to Luna Wang via email at techfamilysolution@gmail.com to schedule a consultation. Let’s help you stay organized and productive with our customized solutions today!